Lecture Homework 7 ENG 4 Fall 2012
Due Thursday November 29 at beginning of lecture.
Grading: 10 points total

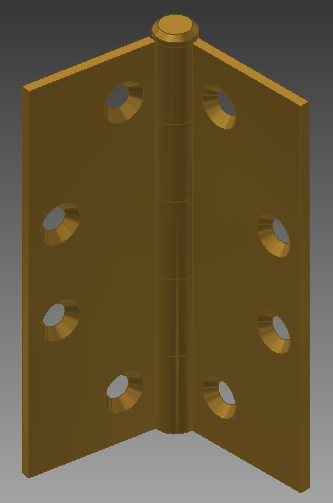
A common door hinge.
The figure above shows a common door hinge made from brass. The Inventor parts have been created for you and can be individually downloaded:
Use Autodesk Inventor to create a set of complete working drawings for the hinge. Create a single idw file that contains one A sized sheet for each part and one A sized sheet with an assembly drawing. Turn in a single PDF export of the four sheets to smart site. The drawings should definitely have the items from the list below, but consider all we've talked about so far and use your judgement to include all necessary information needed to correctly manufacture the parts.
Include:
- Title blocks with standard information.
- Borders on the drawing.
- Include all necessary dimensions but not redundant ones.
- Tolerance all dimensions (use general tolerances).
- Use geometric dimensioning and tolerancing (Chapter 10) where necessary (see below).
- Parts list with bubbles pointing to each part in the assembly drawing.
- etc
Think about the function of the hinge. Take a look at a real door hinge and see how it works. The hinge plate cylinders must slip together and rotate relative to each other. Choose a fit that doesn't give interference but isn't too sloppy for the mating cylinders. When the door is closed, the hinges must lie flat against each other. Make sure you specify tolerances such that the hinge can actually close shut when the door is shut. The ideal dimensions would cause the two inner surfaces to exist in the same plane when the door closes, use tolerancing to prevent that from happening. The pin should fit snuggly in the door side hinge plate with a slight interference, but have clearance on the jamb side so that the jamb hinge plate rotates about the pin. This shouldn't be too loose though, because then you could wiggle the door in the jamb once it is all assembled. The hinge pin should be held parallel and straight relative to the two inner surfaces of the of the hinge plates and offset the correct distance. The location of the holes should be positioned such that they could mate up well with another set of holes on a metal door jamb and door. Follow the steps on page 563 of the book to control the features.
There are multiple solutions to this assignment. Use your best judgement and discuss the problem with your classmates to come up with the best solution.